[Adan]  This new Flip vidcam is pretty sweet.  I wanted to test it out a little more, see how it could do recording audio.  Soooooo: here's a video of our prototype marimba.
Apologies/Disclaimers/Excuses: we still haven't made nicer beaters, so those are pretty rough-looking.  I was trying to kneel out of the shot, so that made it hard to balance... but I'm not saying I would have played it that much better anyway!  And the audio isn't awesome.  Not terrible, considering the tool, but not awesome.  It sounds a little better than that.  The highest notes really are painfully piercing, so if you picked up a little of that, well, that part was accurately recreated!
All that being said, it's still a lot of fun to play.  I look forward to when we have a chance to come back to it, iterate it one or two more times, and then get it out there on the market.
 
[Adan] Actually, the content of this post is provided by Jennifer: she's asked me to link to a FastCoDesign blog entry describing this amazing machine:
Picture
The article describing it, and especially the video showing it in action, is fantastic.  It's a bit confusing at first: I thought it was recreating patent drawings from patents in a way that showed the evolution of solutions to a given problem.  Instead, it seems to be choosing the patents (and, subsequently, the images) by finding keywords that relate to a story that's been provided in text form.  So it really does earn its name, "The Arbitrary Apparatus," but there are still some conceptual connections between the images in the sequence.  

I think it has a way of putting your mind in a storytelling mode: you see things in a format that leads you to believe you ought to be able to figure out a plot or meaning, and you force yourself to come up with one or both.... though it may be entirely different from the input text.  Brilliant!  This could be an incredibly powerful brainstorming tool, inducing drastically lateral idea generation.
 
[Adan]  We haven't talked about the ukuleles very much recently, what with all the other stuff we've been playing with, so I wanted to do a quick post mentioning that we do still love them and make them and play them every single day.  My workspace is kind of awesome, in that regard: within arm's reach I have accumulated (in addition to several other instruments), four Akertoys ukes, each a prototype from one of the stages of the design's evolution.  Distracting?  Procrastination bait?  No, not at all!
Picture
headstock
I'm still delighted that the bent headstock design has worked out so well.  I still love the unbent (alpha model) style too, but figuring out how best to make this bent one took some effort and so it makes me very happy to see it.  And of course, tuning with the geared tuners is also a delight.
 
[Jennifer]  Hi!  Just a quick note to share some photos from a quick Labor Day camping trip Adan and I took this past weekend.  (Or, more accurately, the Great Let’s-get-the-heck-out-of-Downtown-before-Boomsday Exodus.)
Adan found a great site on the western border of the Great Smoky Mountains National Park, just a few miles outside of Maryville, TN.  
Picture
Was that a bear?
My Dad loaned us a camping stove (THANKS, DAD!), and we made an old classic for dinner.  Proximity of the car in the background of this photo underscores the extent to which this was true dump camping.
Picture
Dinner delight: vegan kielbasa, green pepper, pineapple, + rice
The site was right along Abrams Creek.  We got to explore a bit and went for a very easy hike.  We saw flowers that are a shade of red that feels like it’s burning a hole in your retina if you stare too long.  
Picture
My eyes!!
What did kitty do while we were away?  Pretended her people were coming back soon to play more string game.
Picture
Did not miss them at all.
 
It works... golly, those must be the two most beautiful words in product development.
Picture
The candy dispenser is pretty much 100% jam-free now, bless its little heart.  To get there, we had to go to individual holes for each M&M, and heavily chamfer each hole.  The little chocolate lentils will stack two high in the hole, but the chamfers let the top one slide off perfectly.  So.  Ready for a video?
The rapid actuation at the end is intended to demonstrate that, though it works great at slow speed, the long hole pattern results in the first pair of holes going beyond the trough at the extreme end of travel.  As long as it get there slowly, no problem: the M&Ms fall off while passing over the trough, all's well.  If you really yank it, though, they'll parabolize their way clear over the edge of the trough and take off for freedom.  But hey, I figure if someone's really that excited about yanking on this thing, that's probably just the kind of adventure they're looking for.  Once more: all's well.
 
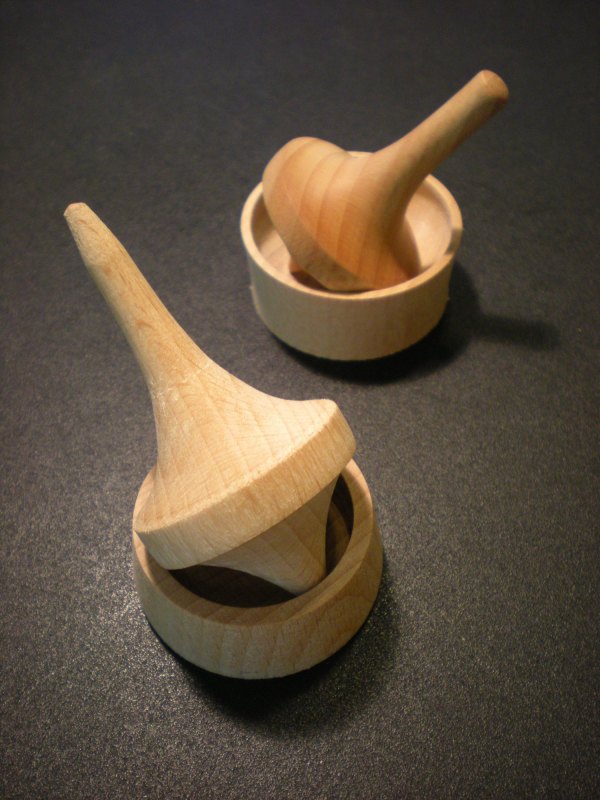
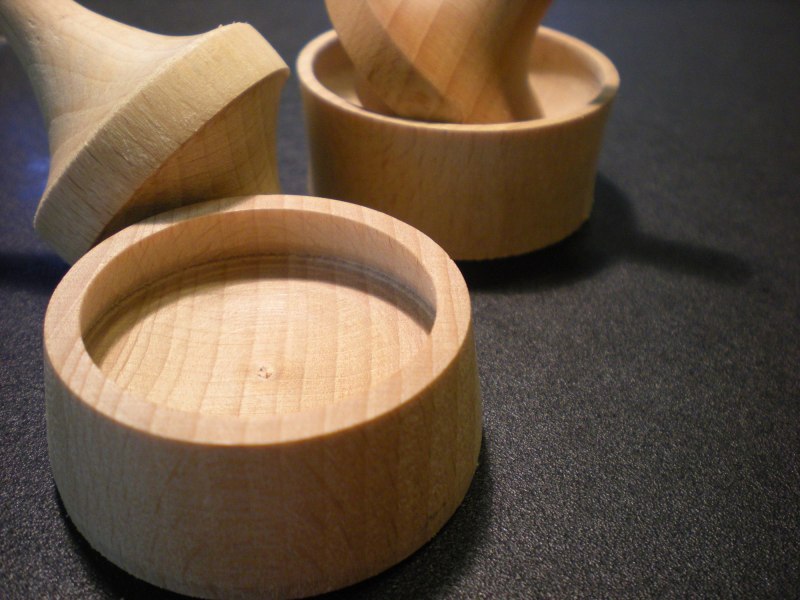
(Adan)  When we made the second stacker toy prototype last week, we actually made enough parts for two of the toys... but only finished and delivered the first one.  So I still have the rough, unfinished bits here, just awaiting the final steps.  I thought it would be fun to post some close-ups of the cut details.
Picture
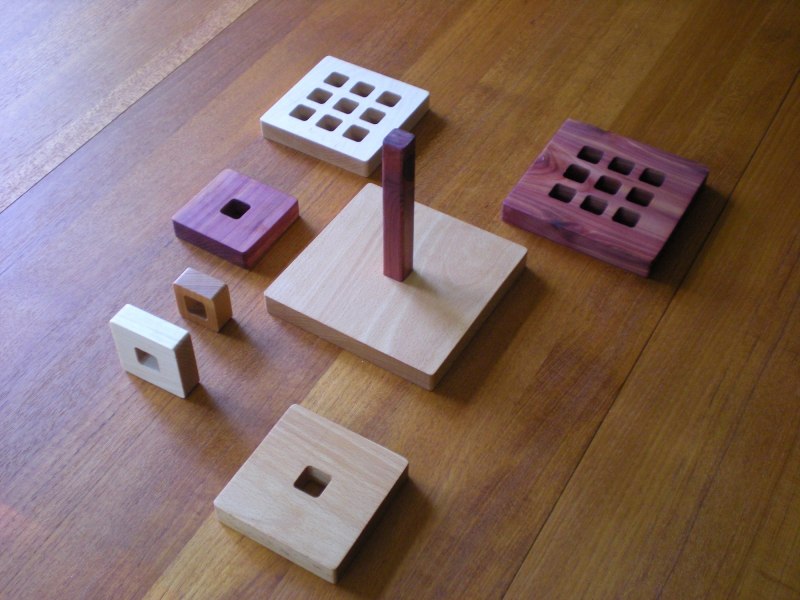
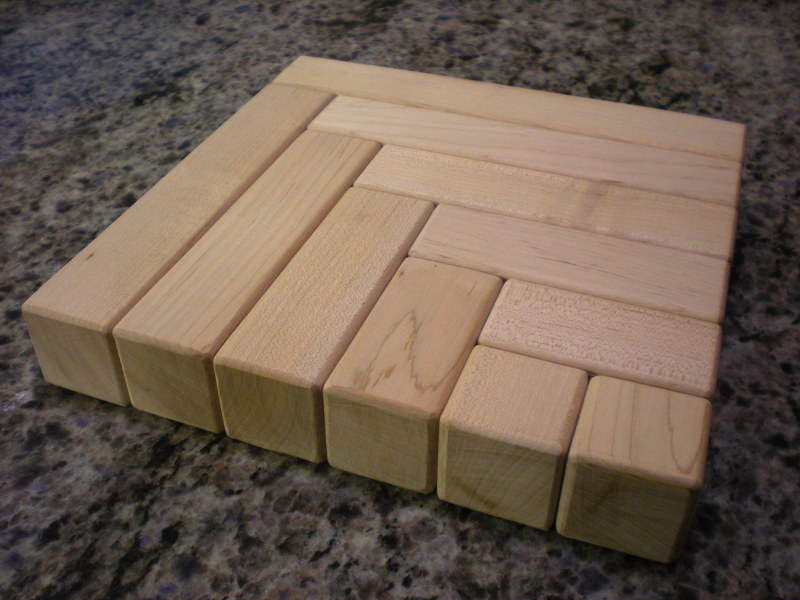
three plates, stacked
That's maple, beech, and cedar (from top to bottom).  If you compare these to the images from the original stacker toy post you'll note the colors are all just a bit less rich.  In part that's the lighting and my amateur photography, but the biggest difference is the finish: the one in the previous post has our beeswax + mineral oil finish applied, which gives it that nice wet look and makes all the colors pop.
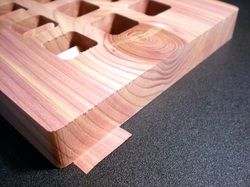
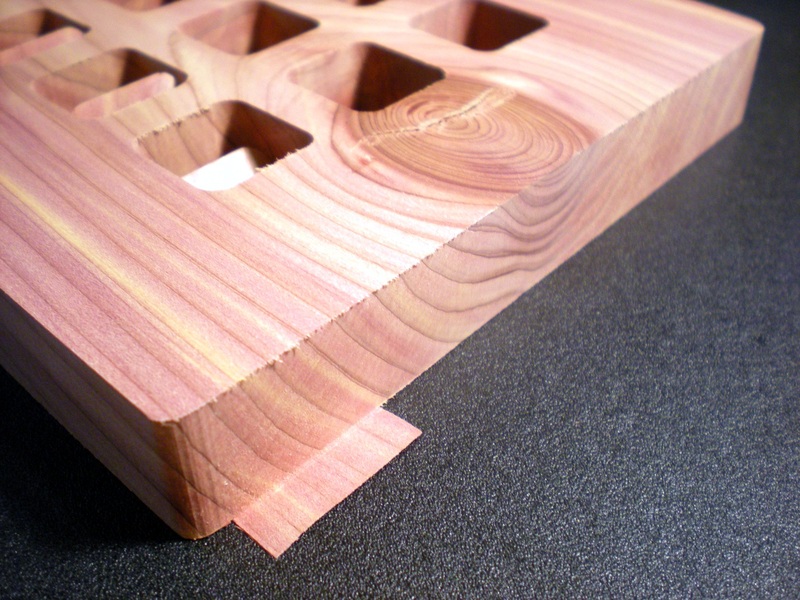
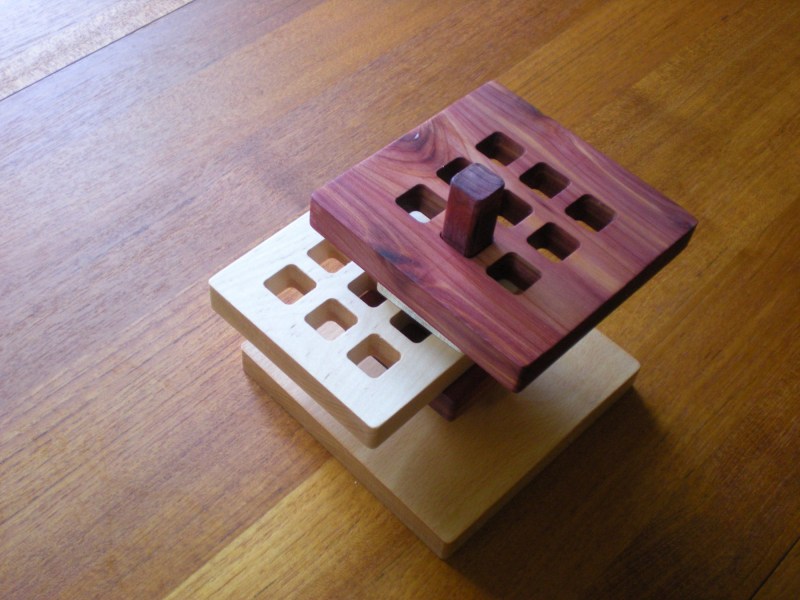
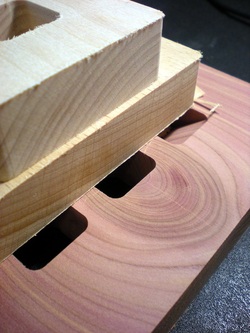
Picture
cedar cut edge
As always, I'm totally in love with the cut section effect you get here, especially where you can see the grain go all warpy around that knot!  Isn't that just the coolest thing?  And the color variations, even without finishing?  Lovely.

That's the orientation it had while mounted on the router.  That little flap at the bottom is what remains of the "skin" that we leave (usually ~0.015") in order to hold the pieces together, even after the profiles have been cut.  After removing them from the router, we flip the pieces and pass them through the drum sander.  Several passes through that removes a bit more thickness, taking the skin with it and freeing up the parts.
Picture
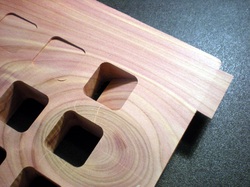
cedar plate, underside
From the bottom, you can see the little remaining bits of skin in the interior holes.  Those tend to get pushed down by the sanding, so they may technically be disconnected but still so snugly fitted that they don't move until you poke them.  Sometimes all you have to do is blow on them and they'll go fluttering away... but that's usually an indication that you've sanded too much and the thickness is now less than you wanted it.

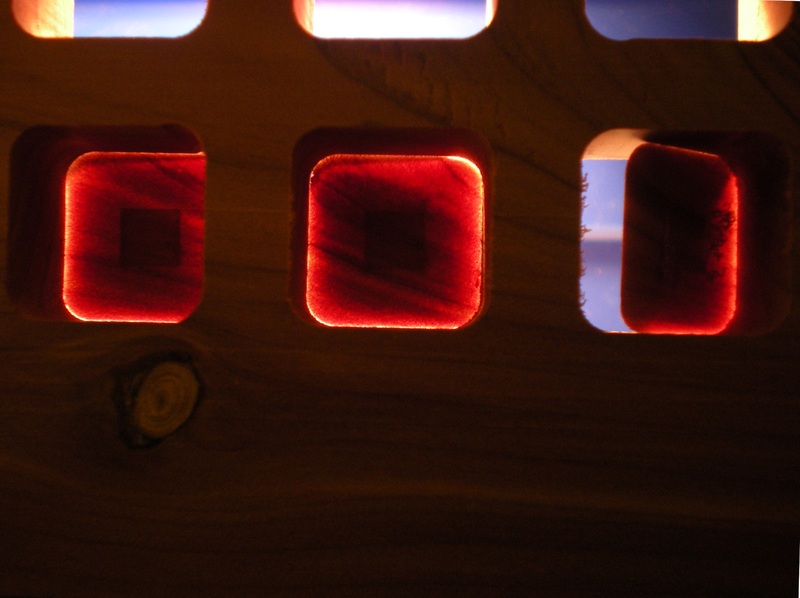
Okay, prep yourself, 'cause this last one's exciting:
Picture
cedar lampshade
That's light shining through those little square flaps.  One nifty thing about this is the gradient: the center of the flap, while it's passing under the sanding drum during that final separation process, has much less support than the perimeter, and thus is able to flex away from the abrasive.  Sure, it gets sanded some, but the edges of the square definitely get sanded through first.  That's of no consequence here, but it used to have a very interesting impact on our ukulele fabrication.  

Imagine if the body portions of the ukulele are held together with a skin, like this, and we're drum sanding it apart.  The soundboard will flex away from the drum, just as did the little square flaps in the image above, and we'll get a contoured soundboard instead of a flat one.  That may be good for tone, or may be bad... but it'll definitely be unpredictable.  So we've changed our methods for that one: no more skin-based holddown.  The soundboards are now consistent.  The only variations are in the wood and whatever tweaking we do to the braces.

Okay, that's it for now!
 
(Adan)  Well, not really an edible execution device.  More like a device that chops M&Ms in half.  We're working on that.
Picture
It's pretty cool, for the most part.  I think the general shape worked out okay, even though I didn't allow the Chief Designer to review it.  I love the feel of the slider mechanism: beech makes for pretty decent linear motion systems, supposedly sliding ever more smoothly with time.   I love the feel of the M&Ms seating, when they seat correctly.  We need to increase the size of the M&M pocket just a hair: we're aiming for 5-6 per dose, and it's giving 3-4.  And, most importantly, we need to keep them from jamming.

The coolest thing is invisible when it's assembled: I tried a new type of joinery, with dowel holes aligning with slots rather than matching dowel holes.  It eliminates setups and allows for staged assembly:
Picture
All in all it's great progress.  More later as it develops!
 
(Adan) We've just completed a quick design-build exercise: make a traditional stacking toy, but make it just a bit... different!  We're excited with what we came up with.
Picture
It's based on one my dad made about a year ago.  His is fantastic, no doubt, but where's the fun in straight replication?  No, we had to make it ever-so-slightly different.  The first way in which we differed was that we used a straight spindle instead of a tapering one.  This allows more flexibility, so the child can put the rings on in any order, without being bound by society's rigid preconceived notions of stable pyramid construction :-)
Picture
In that photo, you'll also be quick to see the next big difference: on the larger rings (plates?) we added eight more holes, so the rings can be placed off center and very odd structures can be made.
Picture
This lets it start out as a simple stacking toy, but also turn into more complicated building blocks as the child graduates to that kind of play.  The square plates are also sized such that each successive plate is smaller than its predecessor by an amount equal to a plate thickness.  This helps make them more "useful" as building blocks, because they can easily be stacked (one on edge on top of one flat, for instance) to make level structures.
Picture
We actually don't have a shot of it in use that way yet; we made enough pieces for two of these, but only finished one... and then immediately gave it away for user testing!  You may recall Oliver, the darling child who modeled the rattle on the multicolored quilt?  Well, he's moved beyond his rattle now.  He's ready for bigger and more complicated things... and he sure seemed to like this.

Oh, right, some specs:

-Base size: 5.72" x 5.72"

-Height: 5.72"

-Materials:
  -base (plate 1): beech
  -plate 2: cedar
  -plate 3: maple
  -plate 4: beech
  -plate 5: cedar
  -plate 6: maple
  -plate 7: beech
  -spindle: cedar

-Finish: beeswax and mineral oil (salad bowl and cutting board finish)

I think it's pretty spiffy.  What do you think?
 
(Adan) More playing with the lathe: I went down this morning and made a quick little cup out of the stump left over from the second top I made (day before yesterday).  These tops and cups are fun and simple.  My turning skills are pitiful at best, but hey: good enough for these little joys!
Picture
The turning process is pretty basic.  At the moment I'm trying to just get the feel of things without going crazy and trying all the tools.  As such, I'm using only a parting tool, skew, and scraper.  Any self-respecting turner is groaning in pain upon reading that, I'm sure...  but it's a start.  I'll learn, just need a little time.
Picture
One first: this time, before boring out the hollow of the cup, I used a drill to cut a 1/2" hole in the middle.  This makes the boring much easier, since you're not messing around with the zero-velocity nibs in the middle.  This was previously impossible, though, as we had no tailstock chuck.  Yesterday, however, I purchased a MT2 (Morse Taper #2) compatible keyless chuck...  and then today, impatient for that to arrive, I researched and found our drillpress already has an MT2 taper on its chuck!  So I knocked the chuck out of the drillpress and slapped it onto the lathe.  Happy times ensued.  There's something truly fascinating about watching a non-rotating drillbit draw curly chips out of a spinning workpiece.
So that was a little video showing the newer of the two tops spinning in its cup.  The cup really isn't an ideal place for the top, but it does make some interesting wobble patterns!  What do you think?
 
(Adan)  One of our early prototypes was recently back out on the table, and we all had a good time looking at it.  It's a complicated one, lemme tell ya: building blocks!
Picture
This prototyped set is made of pieces of maple, square in section, ranging in size from 1.25"x1.25"x1.25" up to 1.25"x1.25"x7.5".  
Picture
These were a very early project.  We've gotten a LOT more tools and skills since then.  A contemporary set would look much nicer, I feel sure.
Picture
But hey, they're building blocks!  They don't have to be fancy to be a lot of fun.  I enjoyed myself greatly just building this reindeer.  Or spaceship.  I forget what it was, but it was absolutely perfect.
Picture
If we were to make another set like this I would probably want them to be made of beech.  I might also consider tweaking the common dimension up to 1.375", which is apparently a standard (??) building block factor.  What do you think?  Oh, and how should they be packaged?